# OwnIdP Settings
Note
OwnIdP settings can only be managed by users with the SuperAdmin role.
The OwnIdP settings can be accessed via the left menu on the main dashboard. The OwnIdP settings are grouped into three sections: Account, Email templates and Custom menu tab.
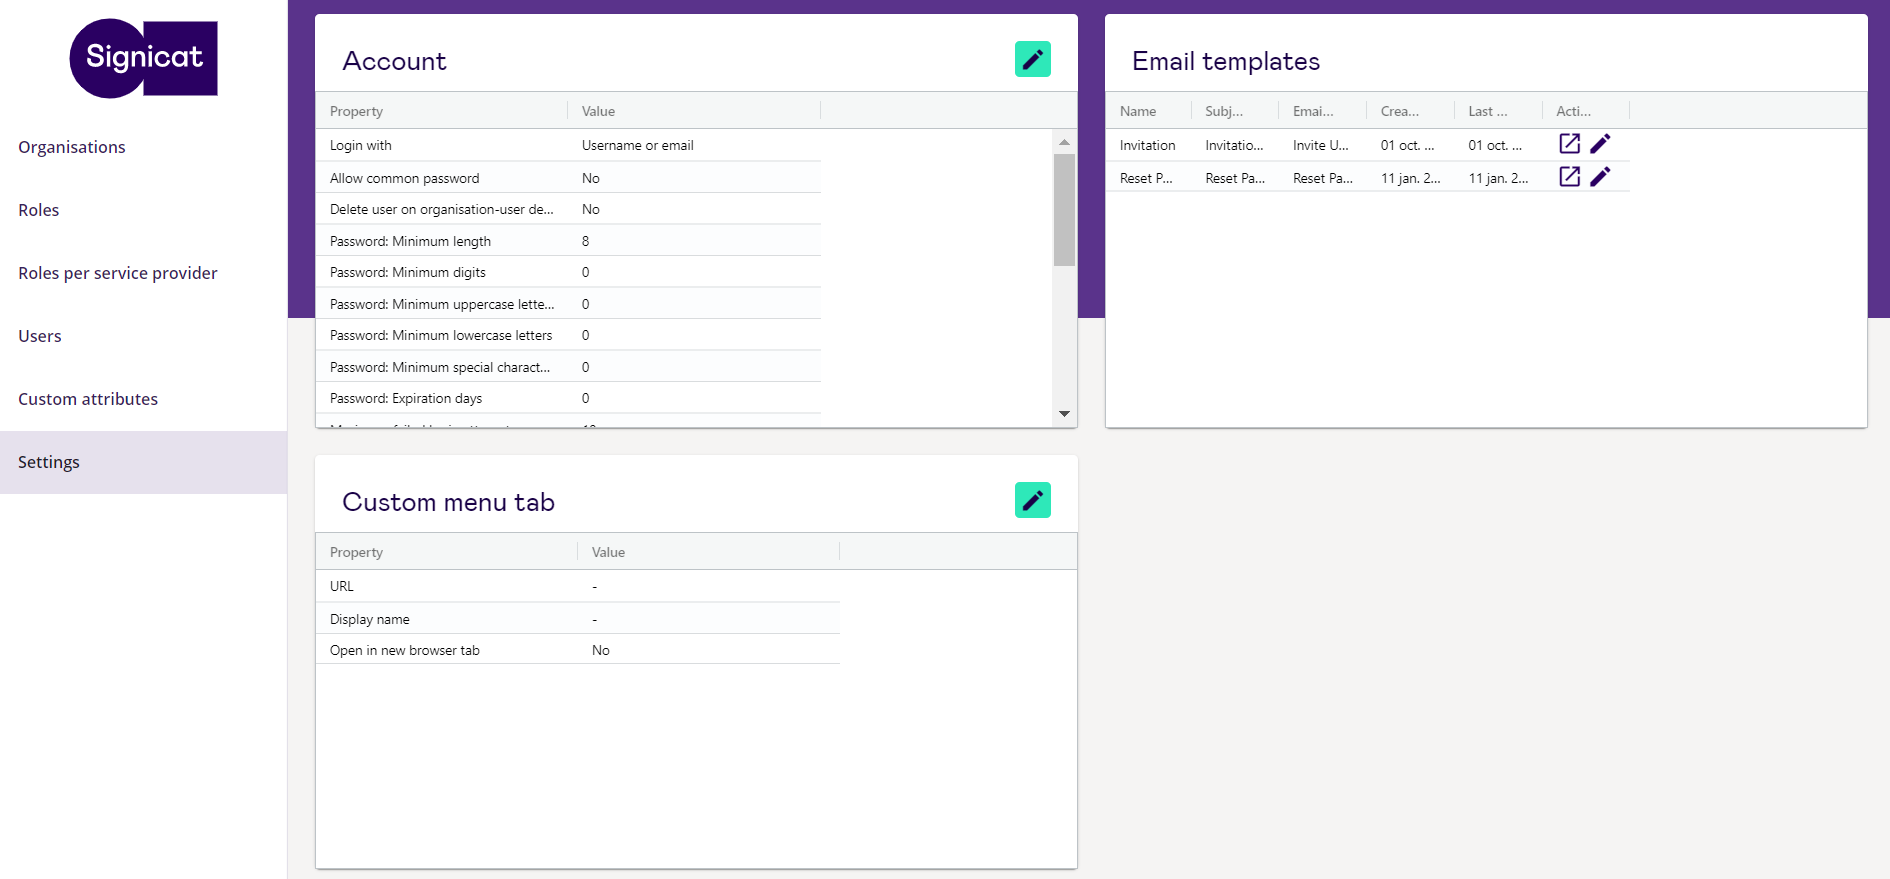
Each settings group can be updated via the Pencil ![]() button.
button.
- Account Manages everything related to user accounts.
- Email templates Manages all created email templates.
- Custom menu tab Adds a custom menu item on the OwnIdP dashboard.
# Account settings
In the Account section, the following account related settings can be configured:
# Login settings
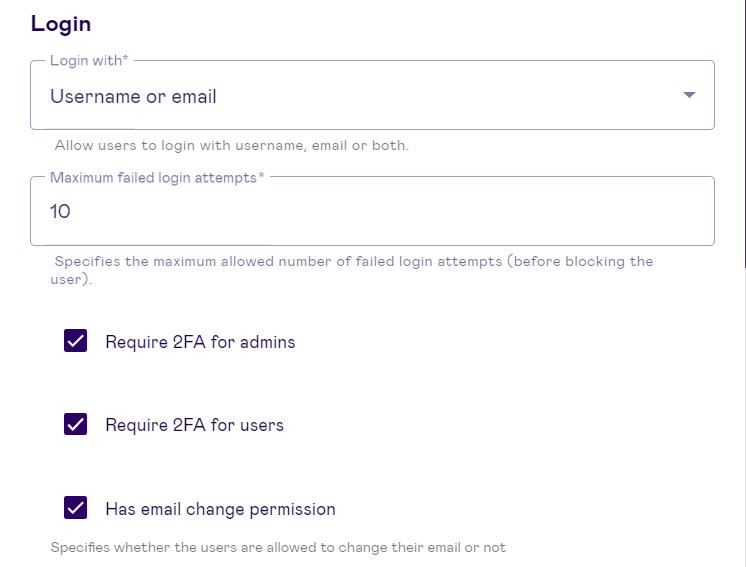
- Login with: Change the login method to allow users to login with either username, email or both.
- Maximum failed login attempts: Specifies the maximum number of failed login attempts allowed before blocking the user.
- Require 2FA for admins: Checkbox specifies whether a two-factor authentication login is required for admin users.
- Require 2FA for users: Checkbox specifies whether a two-factor authentication login is required for regular users.
- Has email change permission: Checkbox specifies whether the users are allowed to change their email address or not.
# Password settings
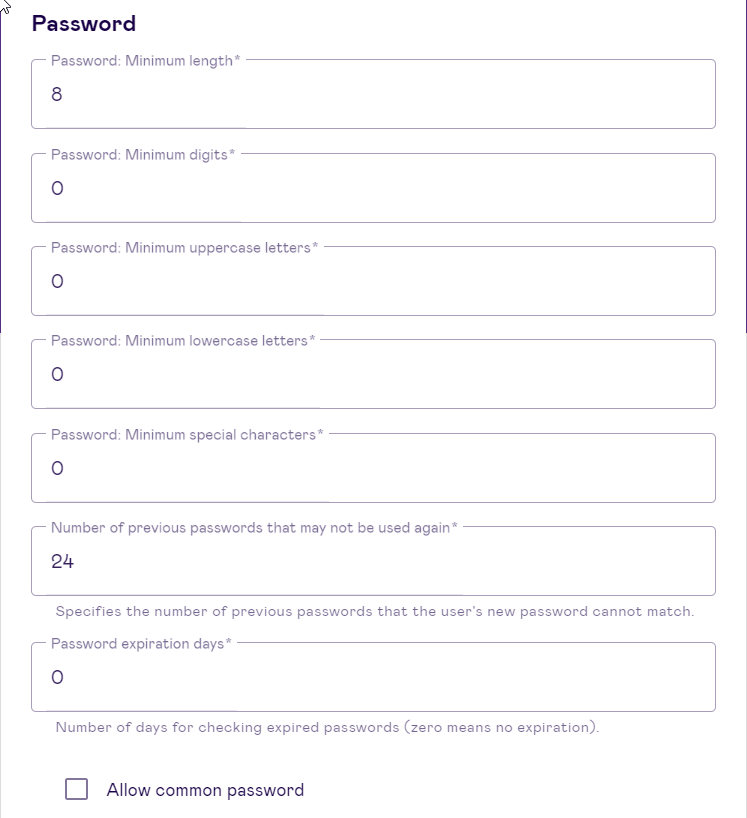
- Password minimum length: Set the minimum number of characters a password must have. Minimum allowed is 8 characters.
- Password minimum digits: Set the minimum number of numerical digits that a password must have.
- Password minimum uppercase letters: Set the minimum number of uppercase letters that a password must have.
- Password minimum lowercase letters: Set the minimum number of lowercase letters that a password must have.
- Password minimum special characters: Set the minimum number of special characters that a password must have.
- Number of previous passwords that may not be used again: Set the number of previous passwords that the new password cannot match.
- Password expiration days: Set the number of days that a password is valid for before it must be changed.
- Allow common password: Allow passwords that are on the 'common password list'. For security reasons, it is recommended to not check this option.
# Session/Inactive users settings
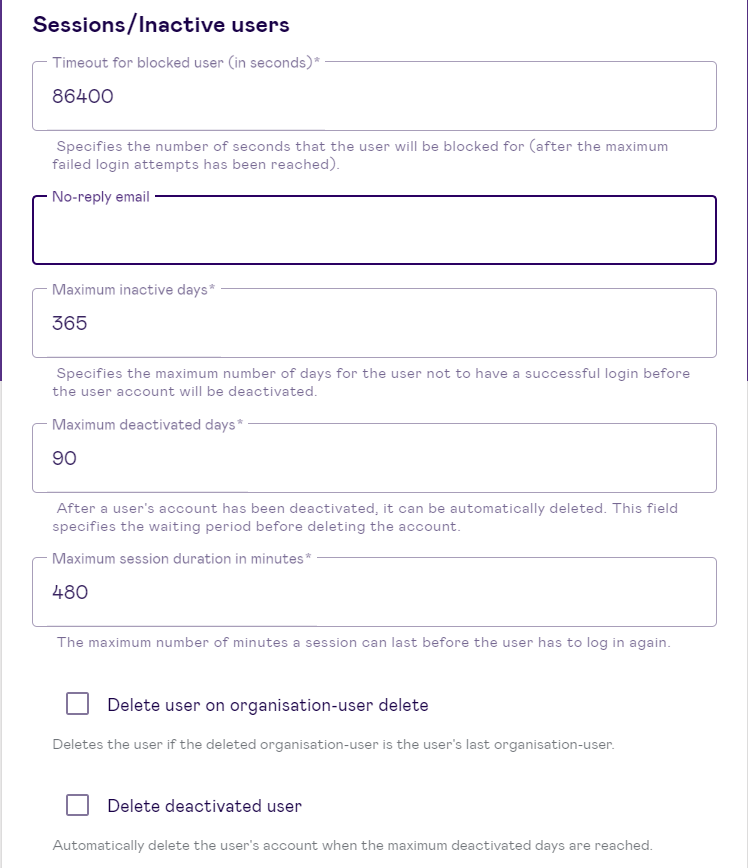
- Timeout for blocked user: Specifies the number of seconds that the user will be blocked for after the maximum failed login attempts has been reached.
- No-reply email: Specify what email address should be used in the "From" field. Note: Add
include:amazonses.comto your SPF record to allow Signicat to send the email from your domain on your behalf. This record can not be in a sub-include. After adding this to your SPF record, you need to contact Signicat Technical Support <technicalsupport@signicat.com> to activate this on our side. We will then provide you with a key (e.g.amazonses:fbXsvZESUsh9s+V9fOQtME+ZdDGfX5kxhsXb5ihyJzs=). Add this key to your domain as a TXT record in order to allow Signicat to send the email from your domain. - Maximum inactive days: Specifies the maximum number of inactive days where the user has not had a successful login before the user account is deactivated.
- Maximum deactivated days: Specifies the maximum number of days when a deactivated account will be deleted (if the previous option was selected).
- Maximum session duration in minutes: Specified the maximum number of minutes a session can last before the user has to log in again.
- Delete user on organisation-user delete: If selected, this deletes the user account if the deleted organisation-user is the only account linked to this user.
- Delete deactivated user: If selected, this deletes the user account if the maximum deactivated days limit is reached.
# Inviting new users settings
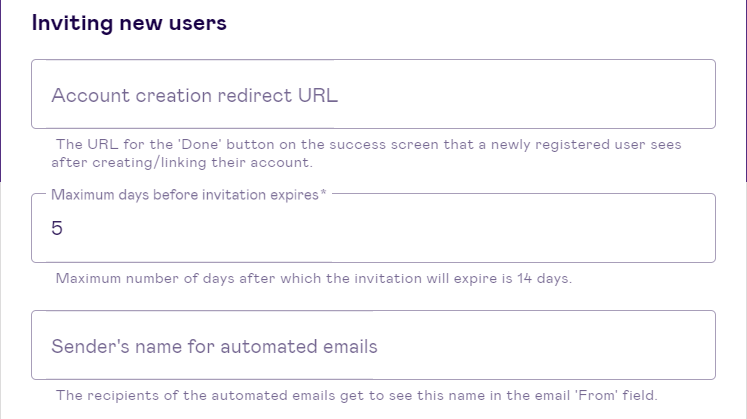
- Account creation redirect URL: This is the URL for the 'Done' button on the success screen that a newly registered user sees after creating or linking their account.
- Maximum days before invitation expires: Specifies the number of days that the link in the invitation email is valid for.
- Sender's name for automated emails: The recipients of the automated emails get to see this name in the email "From" field.
# Custom attributes settings

- Custom attribute to be displayed on the 'Select your organisation' screen: If a user belongs to multiple organisations, this attribute is added behind the organisation name on the select organisation screen that is shown during login.
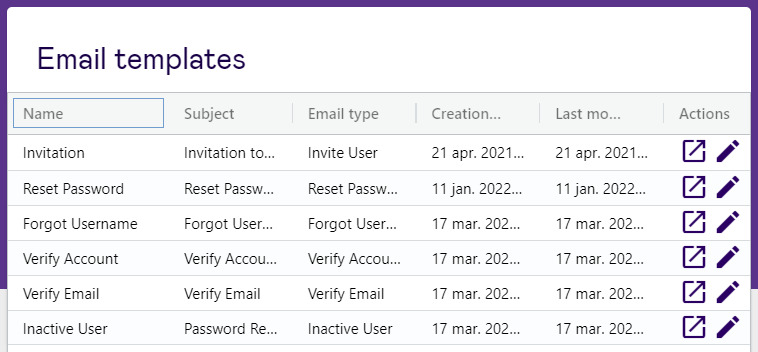
# Email template settings
In this section, you can configure various email templates, including the invitation email and reset password email sent from OwnIdP. Both the subject and the content of the emails can be changed here. The email content is in HTML format with the possibility of inline styling. Plain text emails are also possible.
The following parameters can be used in the content of the invitation email:
- for the email address of the recipient.
- for the link to accept the invitation.
- for the full name of the user who is sending the invitation.
- for the name of the organisation that the user is invited to.
- for the recipient's roles in the organisation.
- for the name of the site.
The following parameters can be used in the content of the reset password email:
- for the name of the user who is receiving the email.
- for the link to the password reset page.
- for the name of the person who is requesting the password reset.
- for the name of the site
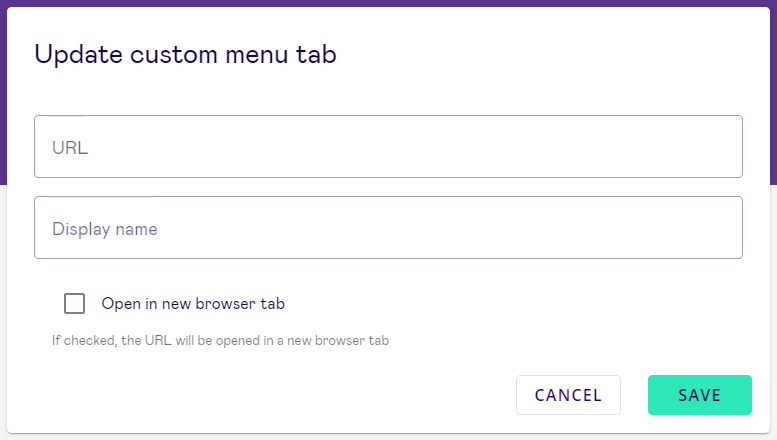
# Custom menu tab
In the Custom menu tab, you can add an additional custom menu item on the OwnIdP dashboard. This is useful for providing admins with a way to get back to the customer portal in the event of a redirect. Using the Pencil button, you can add and update custom menu tabs.